You can format all your text manually if you like but it's much more efficient to use styles. Styles are formatting definitions that you can apply to text and paragraphs with a single click. The style definition is then linked to the formatted text and if you change the definition everything formatted with the style is updated immediately. This works in the same way as styles in a word processor like MS Word.
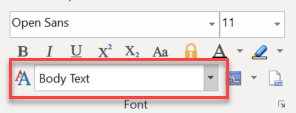
To apply a style to a paragraph just click anywhere in the paragraph and select the style in the Style Selector in the tab:
If you included a keyboard shortcut in the style definition you can use the keyboard shortcut instead of the Style Selector.
If you select text before applying a style the style's font attributes will only be applied to the selected text.
Note: If the paragraph consists of formatted imported text you must select the entire paragraph before applying a style. Formatted text has priority over styles and must be selected to be changed.
|
1.Click in a paragraph in your project formatted with a style you want to change, then select Styles > Edit Styles in the tab.
2.This displays the dialog. The style at the current cursor position is selected automatically.
3.Click on the Font Settings and Paragraph Settings buttons and adjust the font and paragraph settings. If you want you can also apply Borders and Background settings.
4. Click on to close the dialog. The results are immediately visible in the editor and will be applied to all the text in your entire project formatted with the edited style.
The same settings will also be applied to text formatted with styles based on the edited style, for all attributes that have not been explicitly changed in the other styles.
|
There are a number of predefined standard styles. The most important one is Normal, which is the default style for all normal body text paragraphs in your project. Most other styles are based on Normal. This means that changing the settings of Normal will automatically change all text in your entire project formatted with Normal or with any style based on Normal.
Changing the definition of Normal changes the body text style for your entire project in a couple of seconds.
The same settings will also be applied to text formatted with styles based on Normal, for all attributes that have not been explicitly changed in the other styles.
|
In addition to changing the Normal style you will also want to define your own styles so that you can apply complex formatting quickly and change it whenever you want.
1.Select Styles > Edit Styles in the tab to display the Edit Styles dialog:
2.Select Add Style to define a new style, then edit its default name in the Style Name: field. You can change style names whenever you like!
3.Select Font Settings and Paragraph Settings to edit the settings for the style. You can also add a style for the next paragraph; then pressing ENTER in a paragraph with the current style will automatically format the new paragraph with the "next" style.
4.If you want you can also assign a shortcut key so that you can apply the style quickly.
5.Then click on to close the dialog. |
You can define table styles in the dialog (see above) in the same way as you define styles for paragraphs and text.
Applying a style to a table:
Click inside the table, select Properties in the tab and then select the style in the Table Style: field.
Creating a table with a style:
Create a table with Table > Insert Table in the or tab and select the style in the Table Style: field when entering the table configuration settings. Any additional settings you enter in the Insert Table dialog will override the style settings for that table.
|
See also:
Text Formatting and Styles
Dynamic Styles (Reference)