|
Navigation: More Advanced Procedures > Using Variables Editing, formatting and disabling variables |
Scroll Prev Top Next More |
This topic describes how to edit variables in the Help+Manual editor, how to format the content of variables in your output (i.e. with bold text or text styles) and how to disable variables so that the variable name is displayed in your output instead of the content of the variable.

You can create user-defined variables in two modes: As plain text or as HTML code. If you set the variable to HTML mode you can include any HTML code, JavaScript and CSS you like as long as the syntax is correct. You are responsible for this – no syntax checking is performed! HTML variables will only insert the full HTML code in HTML templates and HTML code objects. In other locations only the plain-text portion of the variable value will be inserted. If there is no plain-text portion nothing will be inserted. |
You can "nest" text variables, i.e. you can use one variable as part or all of the value of another variable. To do this just type in the variable name in the value field of the other variable, using the standard variable name syntax <%VARIABLENAME%> (spaces are allowed). Nesting is not allowed in HTML variables: Unlike plain text variables, you cannot nest HTML variables. Nesting is not supported at all in HTML variables: It is also not possible to nest a plain text variable inside an HTML variable, or an HTML variable inside a plain text variable. |
In the Project Explorer go to Configuration > Common Properties > Text Variables and edit the values of the variables in the list. If the variable value is grayed out it is protected and you must first unprotect it by setting the protected switch to No in the Protected column.  You can also double-click on a highlighted button variable in the editor and then select More... to display the variable editing window. (This is not possible with manually-typed variables without a button highlight.) 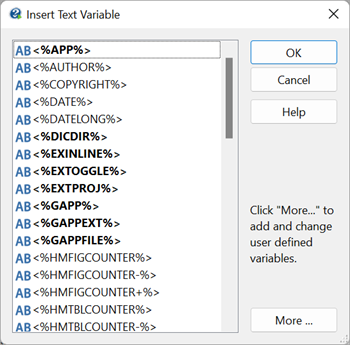 |
Importing and exporting: The Import and Export buttons next to the variables list allow you to save your variables to a file and load variable definitions saved in a file.
Export exports the current variable list to a text file, using the standard INI format. (You can use this to get a full example of the format if you like.) This only includes your user-defined variables. Help+Manual's own predefined variables are not exported. It also does not include the Type (HTML or Text) or Protected attributes. Import imports a list of variables and corresponding values from a plain text file using the standard INI format, adding them to the project's variable list. You must set the variable type (HTML or Text) manually after importing the list. The file must be be a plain text file, and it must be encoded in the UTF8 format if it includes any accented or special characters. The type cannot be stored with the list. When you import you can choose to merge the imported list with your existing variables or replace all the existing variables completely. Syntax: VARIABLENAME=Variable value You can get an example of a variable list by using Export. Enter one variable per line without spaces on either side of the = sign and with a hard carriage return at the end of each line. Example: PRODNAME=Widget Confabulator 3
Deleting, Moving and Sorting: The Delete, Move and Sort buttons are for managing and organizing your variables list:
You can select multiple variables for moving and deleting with SHIFT+Click and CTRL+Click. This also works for multiple individual variables with unselected variables between them. The Sort button sorts the variables list alphabetically. |


You cannot edit the names of variables in your variable definitions – they are fixed there and to "edit" the name you need to create a new variable with the desired new name. This section is about editing the names of variables that you have inserted in the topics in your project. Variables in your project are actually always just plain text variable names identified by the tag delimiters <% and %>. When you use the Insert > Text Variable function the variables are displayed as highlighted buttons for easy identification and you can double-click on them to display the variables list, but this is just for convenience. You can also type in variables manually. The clickable highlight is just an editing convenience to make the variables easier to see and use. Editing the names of variables inserted with the Variable tool:•To edit a variable name just click once inside the highlighted variable name and type. (If you change the variable to one that does not exist it will not work, of course...)  •To display the variables list double-click on the highlighted variable in the editor. If you then select a different variable from the list it will replace the original variable in the editor. Editing the names of variables typed manually:Variables typed manually are normal text and their names can be edited normally. They cannot be highlighted and you cannot double-click on them to display the variables list. Highlighted variables at the beginning of a paragraph:If a highlighted variable is at the beginning of a paragraph you can't insert any text before it; all the text you type to the left of the variable will also be highlighted. Here is how to solve this problem: 1.Click to the left of the variable and press Enter to create a new paragraph. 2.Press the space bar followed by Backspace and type your text. 3.Click to the right of the new text and press Delete to bring the variable up into the same paragraph. If you type text instead of pressing the space bar it will be highlighted as a variable. To correct this just right-click on the highlight and select Convert to plain text. |
The values of variables are stored as plain text, without any formatting information. However, you can easily turn the content of variables into formatted text with bold, underline or styles in your output by formatting the variable name in the Help+Manual editor. Formatting variables manually:1.Select the variable in the editor so that the entire variable is highlighted. This is the same for both variables typed manually and variables inserted with the  Formatting the variable formats the variable Be careful to select the entire variable – if you only format part of the variable it can no longer be identified correctly by the compiler! 2.Use the formatting options in Write > Font to format the variable. For example, if you format the variable with bold and italic the variable's value will be bold and italic in your output. Formatting variables with styles:If you include variables in paragraphs that use paragraph and font styles you don't need to do anything – the variables' values will automatically be formatted like the rest of the text in the paragraph. If you have defined text-only styles (see Defining styles) you can apply them to variables: 1.Select the variable in the editor so that the entire variable is highlighted (this is the same for both variables typed manually and variables inserted with Insert > Text Variable). Here too, be extremely careful to select the entire variable – if you only format part of the variable it can no longer be identified correctly by the compiler! 2.Apply your text-only style by selecting it in the style selector in the Toolbar, pressing the hotkey combination you have defined for the style or by selecting Format > Format with Style. |
 Text Variable tool in
 Sometimes you may want to include the variables themselves rather than their values in your output. For example, this was necessary in this help in all the places where examples of the variables are displayed – if we had not disabled the variables here the values of the variables would have been displayed and the examples wouldn't have made much sense! •To disable variables just type a \ backslash character between the opening <% tag delimiter and the variable name. This works in exactly the same way for all variables anywhere in your project. It also works both for the green highlighted variables inserted with Insert > Text Variable and variables typed in manually. •Note that you only need to disable variables that are actually defined in the place where you are using them. You don't need to use the backslash character to disable undefined variables or for variables that are not supported where you are using them. For example, if you type the special HTML template variables in a topic the variable names will always be displayed in the output because they are not defined there. •To also include the backslash character as shown in the examples below just type two backslash characters! Examples:
|

The highlight displayed for variables inserted with Insert > Text Variable uses the same system as the highlighting used for hyperlinks. You can turn the highlight off by right-clicking on the variable and selecting Convert to plain text in the context menu displayed. The variable will still work when you do this, but it is then just like a manually-typed variable. You can no longer-double click on it to display the variables list. This is not reversible! You can undo it with Ctrl+Z or |
 Undo in
 See also:
Variables and Conditional Output (Reference)